Wednesday, August 1, 2012

Breakfast Make Ahead Muffins


Now, I don't think it's a huge secret that I didn't write all of the recipes that I post on my blog.  

I know, some of you are shocked and dismayed right now.  Such is the burden of my life.

Some things I've done myself, some things are family recipes passed down to me through generations, and some things I've seen on other people's websites... and I just have to try them for myself. 

Not everyone reads the same blogs that I do, and some people are really missing out on some great recipes!  Like this one for example.  I saw it on The Pioneer Woman's website and I just had to try it out.  It was SO delicious I just had to share it with the rest of you!  

So let's make some Make Ahead Muffins, shall we?


Really these are super easy.  My favorite part of it though is that you can make this today, and store it in your fridge for the rest of the week for breakfasts!  And with the way my husband and I like to run out the door in the morning a make ahead breakfast is always ideal.

Now go ahead and hard boil a dozen eggs.  


I actually just read on Pinterest that you can hard boil eggs in the oven in muffin cups!  I really have to try that soon.

While those are cooking go ahead and start frying up your bacon.


Frying bacon.  Is there any better smell in the world?  I don't think there is.

Once the eggs are done, go ahead and peel them and place them on a chopping board.


Because you're going to do a rough chop of all 12 eggs.  

It doesn't have to be perfect, but make sure you have each egg chopped down to at least quarters, if not more.


Be sure to fully drain your bacon... because for as delicious as bacon is the grease is not.

At least that's what my butt has been telling me lately.


Then do a rough chop for this like you did for the eggs.


Place both the eggs and the bacon in a big bowl.  And I mean a big one!  

Make sure it's not one you're going to miss if it's stored in the fridge for a week as well.


Now go ahead and in the bowl add your freshly grated cheddar cheese.

And I can't stress enough that with this recipe it really needs to be freshly grated.  I've found that cheese you grate yourself just melts so much better than bagged cheese from the store.


Now plop in your mayonnaise...


Dijon mustard...


Garlic powder...


And Worcestershire sauce.

I'm fairly sure worcestershire is one of the worst cooking words in the world.

Next to moist.


Now, get a spatula out and begin to slowly fold all of your ingredients together.  You don't want to mix too hard otherwise you're just going to get eggs and bacon paste.  

You don't want that.


You'll know when it's completely combined though, cause it will look like chunky egg salad.

And that's okay!


Now stick the entire bowl in the fridge overnight.  It's hard, I know... but trust me it's worth the wait.

In the morning, go ahead and spread some of the mixture over two halves of an english muffin.


Now stick both halves on a baking sheet. 

I have a toaster oven, which makes this process a little easier on me... but if you don't have one don't fret!  You can do this on the top rack of your oven.  Just turn the oven on broil and make sure they're not too close to that heating element!


Stick them in for about 3 to 5 minutes, or until they start to get brown on the top.


Oh yeah!  They are ooey and gooey and delicious and actually packed full of protein, which is something you need in the morning.

See?  I told you it was worth sharing!!

Breakfast Make Ahead Muffins

12 whole Hard-boiled Eggs, Peeled And Chopped
2 cups Grated Cheddar Cheese
1 cup (Real) Mayonnaise
12 slices Bacon, Fried And Crumbled
1 Tablespoon (heaping) Dijon Mustard
1/2 teaspoon Garlic Powder
3 dashes Worcestershire Sauce
6 whole English Muffins Split

Combine eggs with all other ingredients. Fold together gently. Cover and store in the fridge overnight. Spread on English muffin halves, then broil for 3 to 5 minutes or until hot and bubbly.

Makes 12 halves.

Wednesday, July 25, 2012

Wacky Cake


Now I know you were all coming on here, excited to see the muffin melts I showed you last week at the end of the post, but something special happened this week and I just had to celebrate it!

You see, my mom turned 50 this week.  And any birthday to me is an excellent celebration for cake.  Even though we live 18 hours apart I totally made this cake and thought of her.

Then my husband and I ate it all.  Cause it's just the kind of awesome people we are.

Wacky cake.  Not something you generally find in your every day cookbook... but it's super easy and a lot of fun to make!  In fact, it's even easy for the kids!  I bet you even have everything you need to make it in your cupboard right now.  So what are we waiting for?


See?  Simple ingredients that make a delicious moist cake right from scratch.  In fact, this is a 1 pan cake!  No bowl required!  Trust me, it will make you change your mind about making a chocolate box cake from now on.

Now go ahead and get out your favorite 9x9 pan, and don't spray any cooking spray in it.

Dump in 1 and 1/2 cups of flour...


1 cup of sugar...


1 teaspoon of salt and 1 teaspoon of baking soda...


And finally 1/4 cup of cocoa powder, unsweetened.  


And that's it for the dry ingredients!  Now just take a fork or a whisk and mix all of those dry ingredients together.  Make sure there's no little pockets of unmixed ingredients.

Then just kind of shake the pan a little bit to flatten out the top.  


Now comes the fun part!  It even made my husband come over and watch because he was so interested in what came next.  

Go ahead and make 3 holes in your dry ingredients.  You can make them a nice hidden Mickey like I did, or in any pattern you want.  


Now, in the top two holes put in 1 Tablespoon of white vinegar and 1 teaspoon of vanilla extract.  If you have pure vanilla extract that's better... I didn't though and it still tasted fantastic.

The real fun here is watching the vinegar start to foam up and hearing it bubble.  Why?  Because there's baking soda in the dry ingredients!   If you ever had to make a volcano for science class you'll remember that foam well.


Then pour 1/3 of a cup of oil in the last hole.  You'll probably want to make the hole bigger than I did, but if you have a little spillage that's okay.


Now over top of everything pour 1 cup of cold water.  I used water from inside of my fridge, so you know that was cold!

And watch the foamy mess get all over the cake.  I think this was my husband's favorite part!


Now blend all the ingredients until completely combined.  You'll notice the cake batter is bubbling and still sizzling a bit.

It's a cake, it's a science experiment!


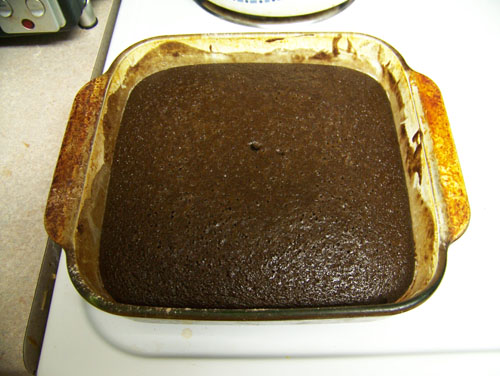
Now pop that baby in the oven at 350 degrees for about 30 minutes, or until the center comes out clean.  I checked it at 25 minutes and the center was still jiggly but 30 minutes did seem to be the magic number.


Now pull it out and let it cool completely.  Which is extremely hard to do.  Because your entire kitchen now smells like chocolate cake.

But what is cake without frosting??  If you want to keep this to a one pan cake and not have to dirty any other bowls you can just use some pre-done vanilla frosting from the store.  

I promise not to tell anyone!

But for me, I really like a good powdered sugar frosting on top... and I didn't have any vanilla frosting in the can.

But this frosting is very easy trust me!


Go ahead and put in your 2 cups of powdered sugar...


Then 2 and a half Tablespoons of softened, not melted, butter.  I just microwaved mine for about 7 seconds in the microwave.


2 Tablespoons of half and half, though heavy whipping cream or whole milk would work just fine here as well.


Finally add 1/2 teaspoon of vanilla.


Now with your hand mixer (or if you're one of those lucky people your stand mixer) go ahead and combine everything until it's light and fluffy.  Don't be afraid to add a little more of the half and half to get it to the consistency that you want it!


Now from here, I like to stick it in the fridge until I'm ready for it.  But it's very hard not to stick your finger in and lick it off.

Not that I know from experience or anything.


Once the cake has completely cooled it's time to frost!  The nice part about the frosting we made is that it's the exact right amount for the wacky cake.  

I like to work things out like that sometimes.

Go ahead and plop the frosting onto the cake...


Oh yeah spread that frosting!


Mmm it looks delicious!

Now I let this set for another 30 to 45 minutes at least to let the frosting harden a bit on the top of the cake, but it's not a necessity.


I have to admit though, it's hard not to just dig right in!

Look at those bubble holes!  It's like eating an Aero bar but only in cake form.

God bless wacky cake.


Wacky Cake

1 1/2 Cup Flour
1 Cup Sugar
1 teaspoon Salt
1 teaspoon Baking Soda
1/4 Cup Cocoa
1 Tablespoon White Vinegar
1 teaspoon Vanilla
1/3 Cup Oil
1 Cup Cold Water

Preheat the oven to 350 degrees. Mix dry ingredients in a 9x9 ungreased baking pan.  Make 3 indentations in the dry ingredients.  In one hole, put vinegar.  In the second hole, put vanilla.  In the third hole, put oil.  Pour water over the top of all ingredients.  Blend thoroughly.  Bake until middle is no longer jiggly and toothpick pulls out clean, about 25 to 30 minutes.

Easy Wacky Cake Frosting

2 Cups Powdered Sugar
2 1/2 Tablespoons Softened Butter
2 Tablespoons Half and Half (Whipping Cream or Whole Milk)
1/2 teaspoon Vanilla

Combine ingredients and beat on medium speed until smooth and fluffy.

Cake serves 9.
 
Blog Template by Delicious Design Studio