Wednesday, August 15, 2012

Strawberry Pretzel Bars


Strawberries.  I'm pretty sure they are the ultimate summer fruit for me.  They are so sweet and so versatile that they really can be used in just about anything.  

And since summer is beginning to slowly wind down for most of us I thought I would go ahead and try to get one more good taste of summer in before the end.  After all, Labor Day is only in a few more weeks for us Americans and this is a great picnic and cookout dessert!  And it tastes like summer.

So let's get started, shall we?


As you can see, there's not a whole heck of a lot to this particular dessert, but it's a lot of fun to put together.  

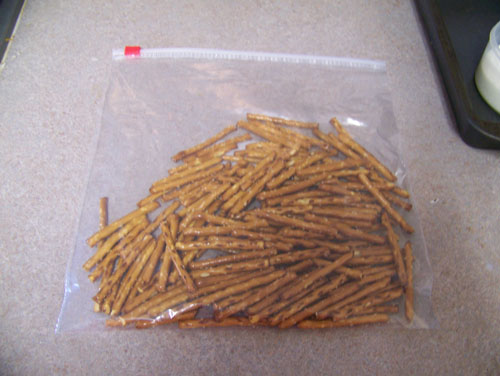
For example, my favorite part of the whole dessert (other than eating it) is right here at the beginning!  Go ahead and put your pretzels in a big plastic bag.


Now beat the living heck out of them.


I'm not kidding!  Whether you use a can or a rolling pin or your head, just beat the heck out of those pretzels!

Okay maybe don't use your head.


But beat those pretzels until you get 2 good cups of pretzel crumbs.


Then go ahead and mix in 1/4 cup of white sugar...


And 2/3 of a cup of melted butter.


Mix it all up until it's really well combined!  Then press it out on the bottom, since this is going to be the crust of your bars. 

Then go ahead and bake this by itself for 10 minutes in a 350 degree oven.  That will help it to set fully.  Then set it aside and let it cool.


Now in a separate bowl go ahead and put in 1 and a half packages, or 12 ounces of softened cream cheese.


Add in a 1/4 cup of white sugar and your 2 tablespoons of milk...


And really mix it together until it's well combined.  

And try to resist sticking your fingers in there and licking them clean.  That's so rude and delicious.


Now throw in your cool whip with the mixed cream cheese, sugar and milk.


Then gently mix everything together until it's well combined.  Again, try to not lick your fingers clean.

No matter how delicious and tempting it may be.

You'll feel awful if you get caught.  Not that I know from experience or anything.


Now take your cooled crust and plop the mixture on top...


And spread it out completely.  Yes, this will look like frosting but that's okay!  You want to make sure to get this mixture in every corner as well.  Once you are done, pop it in the refrigerator. 


Now in a separate bowl, go ahead and throw in your strawberry jello powder...


And your 2 cups of boiling water.


Then stir for about 2 minutes until the powder is completely dissolved.  Just like making regular Jello. 

Only you're going to stick it in the fridge about 1 and a half hours instead of a full 2.  Why?  Well we have fruit to mix in!


Now while that is chilling go ahead and take the opportunity to clean and cut your strawberries.  I cut mine into 4ths but you may feel more comfortable cutting them down even more than that.  The smaller the strawberry the easier the bars will be to cut!


Once the hour and a half has passed go ahead and combine your strawberries and your jello together.


Then pour the jello and strawberry mixture over top of the crust and cream cheese that you've had in the fridge.  


You're going to need to let this set for about 3 hours before even thinking about cutting into them though, and overnight will actually be the best.  

But that's hard.  Oh so hard.  But trust me, it is worth it!

Enjoy your taste of summer!


Strawberry Pretzel Bars


2 cups finely crushed pretzels
1/2 cup sugar, divided
2/3 cup butter or margarine, melted
1-1/2 pkg. (8 oz. each) cream cheese, softened
2 Tbsp. milk
1 cup thawed cool whip
2 cups boiling water
1 pkg. (6 oz.) strawberry flavor gelatin
1-1/2 cups cold water
4 cups fresh strawberries, sliced


Preheat your oven to 350°F. In a 9x13 pan mix your pretzel crumbs, 1/4 cup sugar and 1/4 cup of butter.  Press into the bottom of the pan and bake for 10 minutes.  Cool completely.  


In a seperate bowl, whip the cream cheese, remaining sugar and milk until blended. Stir in cool whip gently; spread over crust. Refrigerate.  Add boiling water to gelatin mix in large bowl; stir 2 min. until completely dissolved. Stir in cold water. Refrigerate 1-1/2 hours or until thickened.


Cut strawberries into small pieces and stir into gelatin; spoon over cream cheese layer. Refrigerate 3 hours or until firm.


Serves 16.

Wednesday, August 8, 2012

Cheesy Chicken Croissant Casserole


There is nothing quite like an easy dinner, and I tell you what this one is not only easy but it will have the people in your life begging for more over and over again!

At least that's what is happening in my house.

This particular recipe is pretty rich though, so you can split it between quite a few people and everyone is going to get enough.  The original recipe called for twice the amount of croissants that I used, which I imagine would make it even richer!  But I like big and flaky so that's what I used.

But enough of my babble, let's get started, shall we?


As you can see, there are quite a few components to this particular recipe.  While it may look a bit intimidating it really isn't... especially because a lot of it is a "throw this in a bowl and mix it all together" style of cooking.

First, let's make the sauce that will go in the pan.  Go ahead and put 1/2 cup of half and half in a sauce pan and combine it with the following...


3/4 cup finely shredded cheddar cheese...


1 can of cream of chicken soup, undiluted...


And black pepper to taste.


Then you're going to mix all of that up and let the cheese begin to melt.  I recommend turning the burner on medium.  Yes, it will take a little longer to melt but you do not want this to boil.  So it will melt the cheese and combine everything nicely without getting to that boiling stage.

Then you'll set this aside.


Now in a separate bowl go ahead and combine 4 ounces of very soft (but not melted) cream cheese...


With 4 tablespoons of very soft but not melted butter.


Then combine the two until it's smooth.

You can also add in the garlic powder here if you are using it, or even season this with seasoning salt and black pepper.  It's not the end of the world if you wait until the end to use these seasonings though.

Like I did.

Because I forgot.

Oh shush.


Now go ahead and chop up your chicken breasts.  You can (and probably should) use smaller pieces than this, but I have some patience issues when it's 8 PM and I'm hungry.


Also finely chop your onion.  If you are not an onion fan no fear... the onion cooks down if you chop them fine enough so that you won't notice they are there.  

If white onion really isn't your thing at all you can also use green onions.


Dump your chicken and onions in the bowl with your cream cheese and butter mixture.


Then mix until every piece of chicken and onion is coated.  Yes, this is pretty thick so you may need to rope someone into mixing for you.

Hungry husbands are good for this.


Now go ahead and add in your 2 tablespoons of mayonnaise...


And your 3/4 of a cup of finely grated cheddar cheese...


And mix until well combined again.  And hey, while you are add it go ahead and mix in that garlic powder you forgot earlier.  

Because you can.


Now drizzle some of the sauce mixture on the bottom of the baking pan.  Not all of it, but just enough to really get a good cover on the bottom.


Roll out your croissants and get them as separated as you can, cursing the fact that most croissants beat you every time you try them...

Or is that just me?


Now spoon a heaping tablespoon on top of the bottom of each croissant... or if you're like me, just eye it until it's full.


And roll that up into a nice and neat little cheesy chicken packet!


And place that in your pan, seam side down...

Or up.  Whatever you feel comfortable with apparently.  

This actually also depends on how stuffed you make your croissants.  If you really stuff them I definitely recommend seam side down.


Repeat the process with the rest of your croissants.  If you have any left over filling you can kind of stuff that around the holes in the pan too.  That way it all gets cooked together!


Now comes the fun part!

Go ahead and drizzle the rest of the sauce mixture over top of the chicken packets.


Then top the whole thing with about a cup of cheese.

Yes more cheese.  Because apparently we can't get enough of it in this house.


Now bake the entire thing for about 30 minutes at 350 degrees.  It will come out bubbly and delicious and brown on the top and oh my god I think I need another piece of this right now!


Just serve with your favorite vegetable... or do what we do.  Make it a cheese night.  Broccoli with cheese.  Needless to say this is the husband's favorite meal of the month.


Cheesy Chicken Croissant Casserole


Sauce
1 can Big and Flaky Croissant Rolls
1 can cream of chicken soup
3/4 cup grated cheddar cheese
1/2 cup Half and Half


Filling
4 ounces cream cheese (very soft)
4 tablespoons butter (very soft)
1 teaspoon garlic powder
1/3 cup onion, finely chopped
2 to 3 large cooked chicken breasts, finely chopped
3/4 cup finely grated cheddar cheese
1/2 teaspoon seasoning salt
1/2 teaspoon ground black pepper
2 tablespoons mayonnaise
1 cup grated cheddar cheese (for topping)


Turn oven on to 350 degrees.  Spray a 9x13 baking dish with cooking spray and set aside.  In a sauce pan mix half and half, 3/4 cup grated cheese and undiluted chicken soup.  Season with black pepper.  Heat until just the cheese melts but do not bring to a boil, set aside.  In another bowl mix the soft cream cheese, butter and garlic powder together until very smooth.  Add in the chopped chicken, onion and cheddar cheese; mix until well combined.  Add in 2 tablesppons of mayonnaise and continue to mix until well combined.  Season with season salt and black pepper to taste.  Unroll croissant rolls and place 1 heaping tablespoon of the chicken mixture on the end of each triangle, rolling it up then at the thicker end.  Drizzle a small amount of sauce mixture at the bottom of your baking dish.  Place the croissant rolls seam-side down on top of the sauce mixture.  Drizzle remaining sauce on top and sprinkle with 1 cup of grated cheddar cheese.  Bake for 30 minutes or until top is brown and bubbly.


Serves 8.

Wednesday, August 1, 2012

Breakfast Make Ahead Muffins


Now, I don't think it's a huge secret that I didn't write all of the recipes that I post on my blog.  

I know, some of you are shocked and dismayed right now.  Such is the burden of my life.

Some things I've done myself, some things are family recipes passed down to me through generations, and some things I've seen on other people's websites... and I just have to try them for myself. 

Not everyone reads the same blogs that I do, and some people are really missing out on some great recipes!  Like this one for example.  I saw it on The Pioneer Woman's website and I just had to try it out.  It was SO delicious I just had to share it with the rest of you!  

So let's make some Make Ahead Muffins, shall we?


Really these are super easy.  My favorite part of it though is that you can make this today, and store it in your fridge for the rest of the week for breakfasts!  And with the way my husband and I like to run out the door in the morning a make ahead breakfast is always ideal.

Now go ahead and hard boil a dozen eggs.  


I actually just read on Pinterest that you can hard boil eggs in the oven in muffin cups!  I really have to try that soon.

While those are cooking go ahead and start frying up your bacon.


Frying bacon.  Is there any better smell in the world?  I don't think there is.

Once the eggs are done, go ahead and peel them and place them on a chopping board.


Because you're going to do a rough chop of all 12 eggs.  

It doesn't have to be perfect, but make sure you have each egg chopped down to at least quarters, if not more.


Be sure to fully drain your bacon... because for as delicious as bacon is the grease is not.

At least that's what my butt has been telling me lately.


Then do a rough chop for this like you did for the eggs.


Place both the eggs and the bacon in a big bowl.  And I mean a big one!  

Make sure it's not one you're going to miss if it's stored in the fridge for a week as well.


Now go ahead and in the bowl add your freshly grated cheddar cheese.

And I can't stress enough that with this recipe it really needs to be freshly grated.  I've found that cheese you grate yourself just melts so much better than bagged cheese from the store.


Now plop in your mayonnaise...


Dijon mustard...


Garlic powder...


And Worcestershire sauce.

I'm fairly sure worcestershire is one of the worst cooking words in the world.

Next to moist.


Now, get a spatula out and begin to slowly fold all of your ingredients together.  You don't want to mix too hard otherwise you're just going to get eggs and bacon paste.  

You don't want that.


You'll know when it's completely combined though, cause it will look like chunky egg salad.

And that's okay!


Now stick the entire bowl in the fridge overnight.  It's hard, I know... but trust me it's worth the wait.

In the morning, go ahead and spread some of the mixture over two halves of an english muffin.


Now stick both halves on a baking sheet. 

I have a toaster oven, which makes this process a little easier on me... but if you don't have one don't fret!  You can do this on the top rack of your oven.  Just turn the oven on broil and make sure they're not too close to that heating element!


Stick them in for about 3 to 5 minutes, or until they start to get brown on the top.


Oh yeah!  They are ooey and gooey and delicious and actually packed full of protein, which is something you need in the morning.

See?  I told you it was worth sharing!!

Breakfast Make Ahead Muffins

12 whole Hard-boiled Eggs, Peeled And Chopped
2 cups Grated Cheddar Cheese
1 cup (Real) Mayonnaise
12 slices Bacon, Fried And Crumbled
1 Tablespoon (heaping) Dijon Mustard
1/2 teaspoon Garlic Powder
3 dashes Worcestershire Sauce
6 whole English Muffins Split

Combine eggs with all other ingredients. Fold together gently. Cover and store in the fridge overnight. Spread on English muffin halves, then broil for 3 to 5 minutes or until hot and bubbly.

Makes 12 halves.
 
Blog Template by Delicious Design Studio